This information is given on the understanding that
I have no
affiliation with m-audio and that any modifications or disassembly of your unit
may invalid any warranty. Furthermore, no responsibility is taken for any damage
to any hardware, software or data as a result of the information I provide.
The following procedure worked for me and maybe you
too can do it yourself and save time and money.
What you will need:
- a small flat bladed screwdriver
- a small cross-head (philips) screwdriver
- low-powered soldering iron and solder
- replacement battery (details given below)
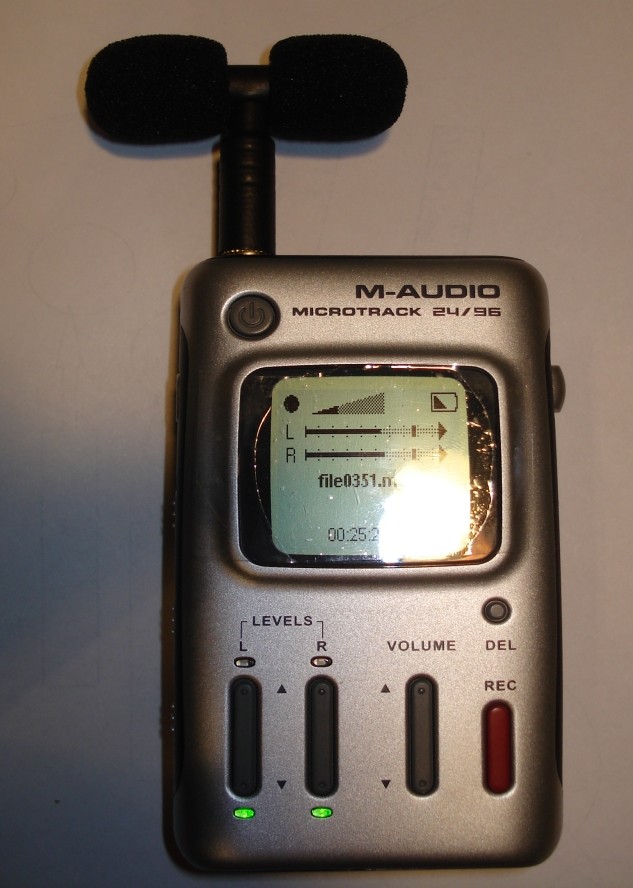
READ THIS FIRST!Read these instructions first so you have a good understanding of how the unit comes apart and goes back together. This will make the step-by-step process of changing the battery easier to understand as you will know the overall procedure. REMOVE YOUR FLASH (SD) CARD TO REDUCE RISK OF DAMAGE
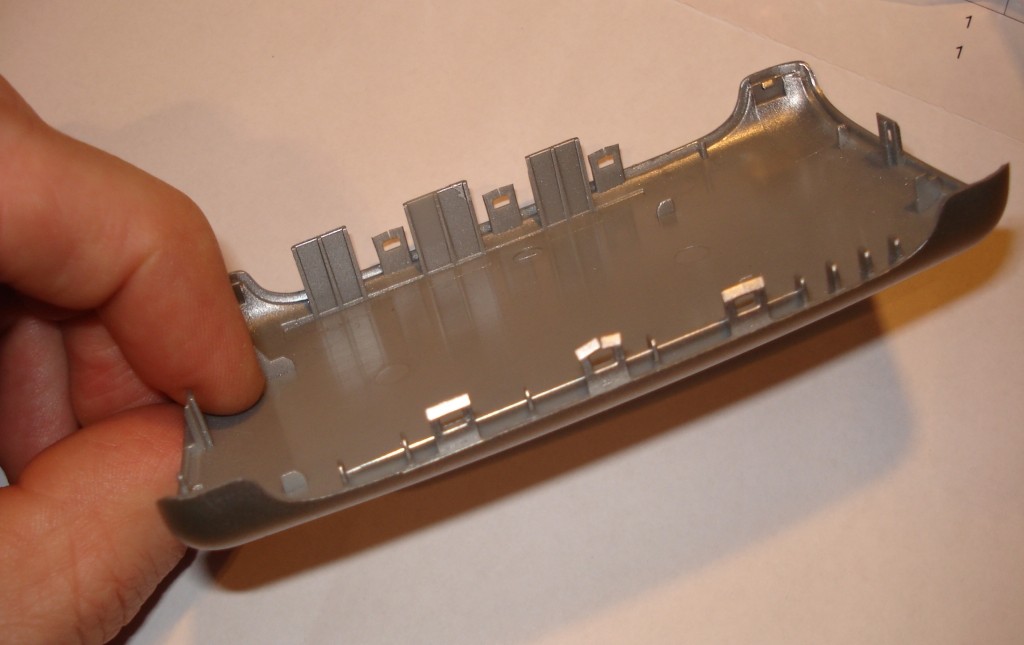
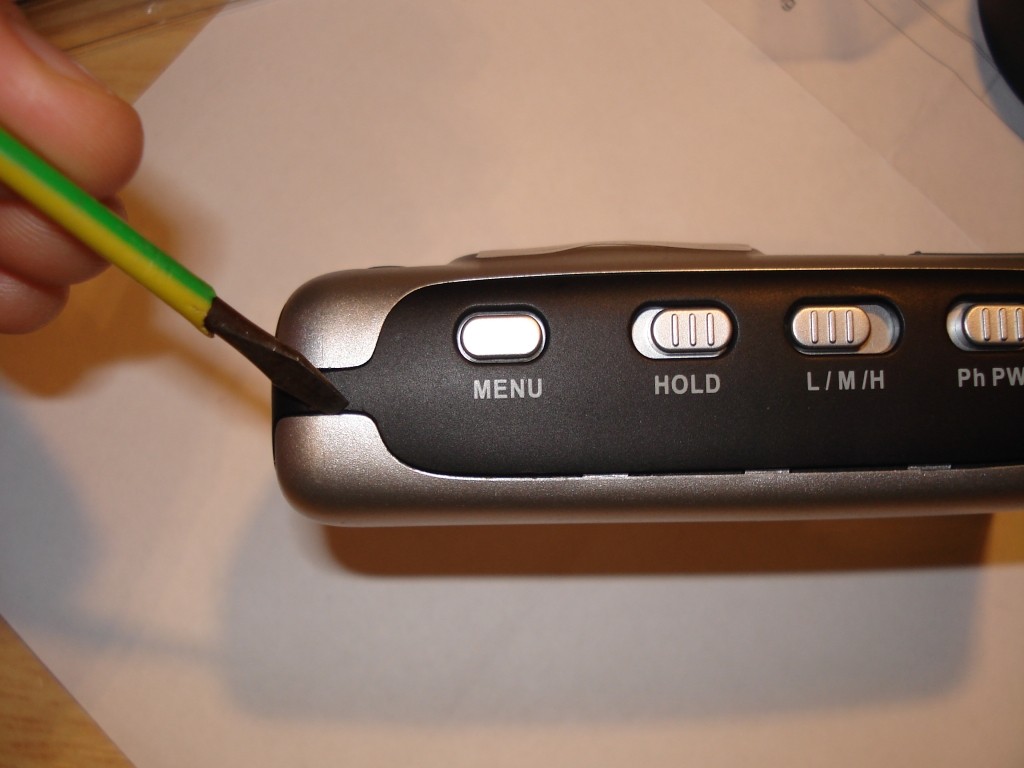
FIRST Opening the unitThe toughest bit about changing the battery is opening the microtrack casing. It takes a bit of nerve the first time as the casing cracks and pops. A tool with sharp point, such as a flat-bladed screwdriver, should be ideal. Insert in the corner of the bottom half of the casing, as shown and lever outward. Hold the casing open to stop it snapping shut back on itself and work your way around the outside opening up all the retaining catches. The four corners of the bottom casing open outwards whereas the sides and top open inwards. Notice how the catches are on the casing. If you know how the unit goes together and how the casing is built it will help you open the unit up.
Observe...Notice the retaining clips that hold the unit together: 3 each side, 1 top & bottom plus one in each of the 4 corners. Also see how i damaged a couple of my retaining-clips on my unit- so you don't have to! (click picture to see larger view)
this will give you a good idea on how to open the unit as you can see where and how the clips attach. |
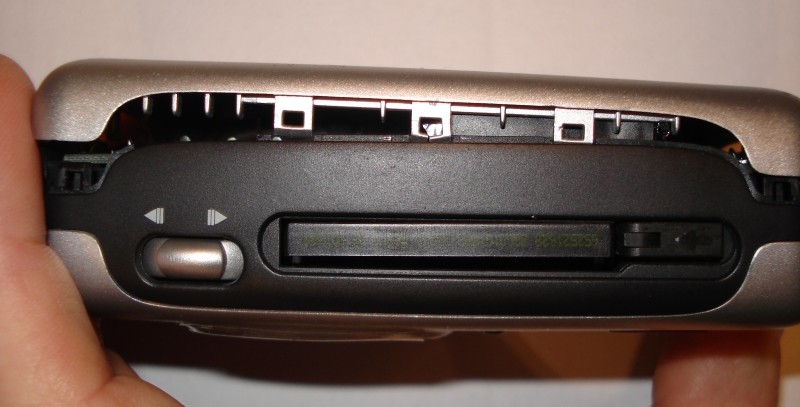
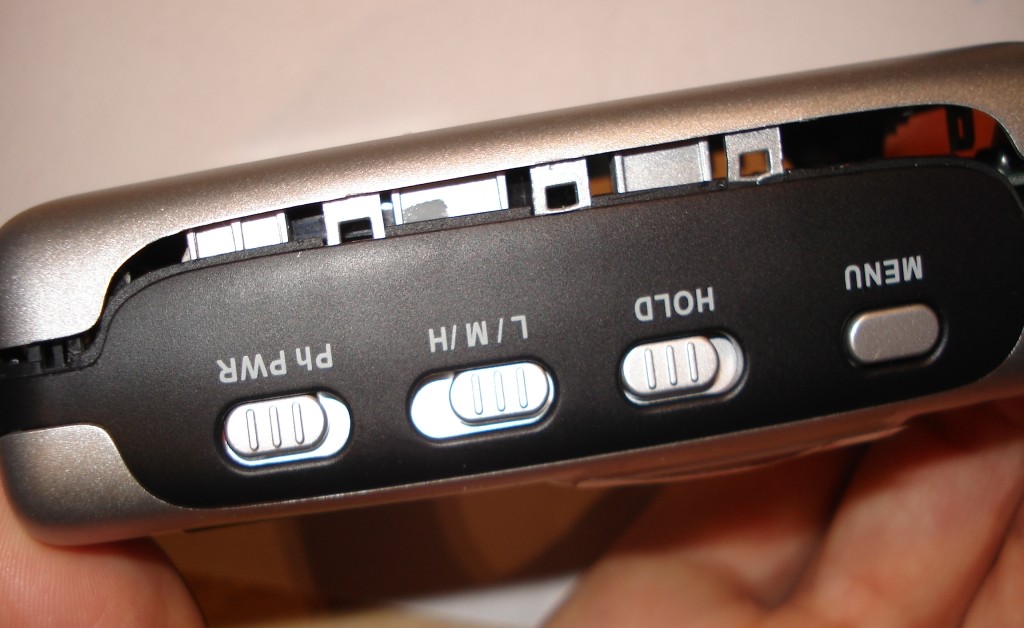
After the bottom casing is off the bottom end-plate will need to be removed. This is held in be two lugs each end. Prize the sides apart and the face-plate should come free, |

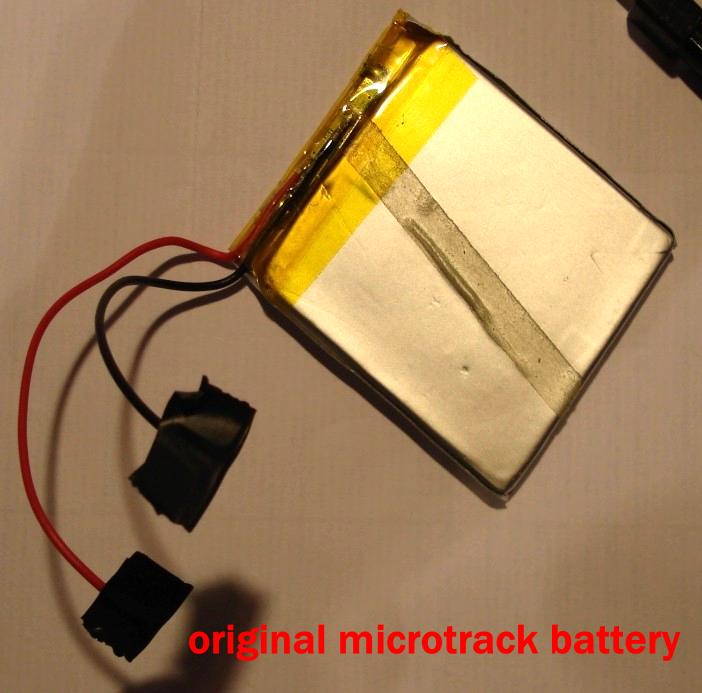
Removing the old batteryThe original battery:
the original battery was stuck to the circuit board with double-sided sticky tape, as see on this picture. A gentle lift removed it from the circuit board. Spec: 3.7v Lithium-polymer-ion current wise, i'm not sure, but estimated between 1600mAh - 2000mAh
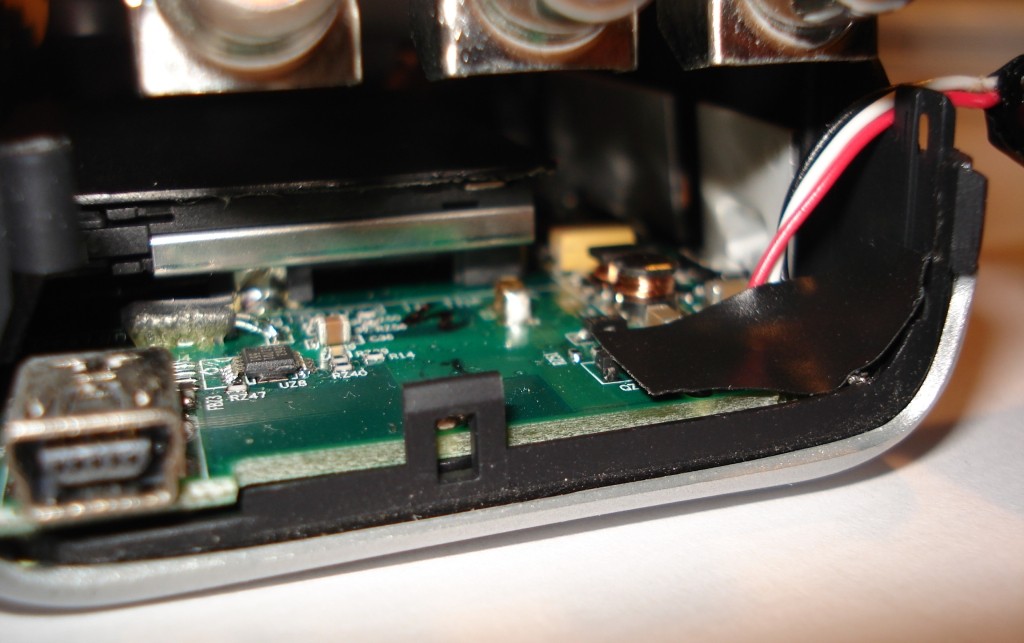
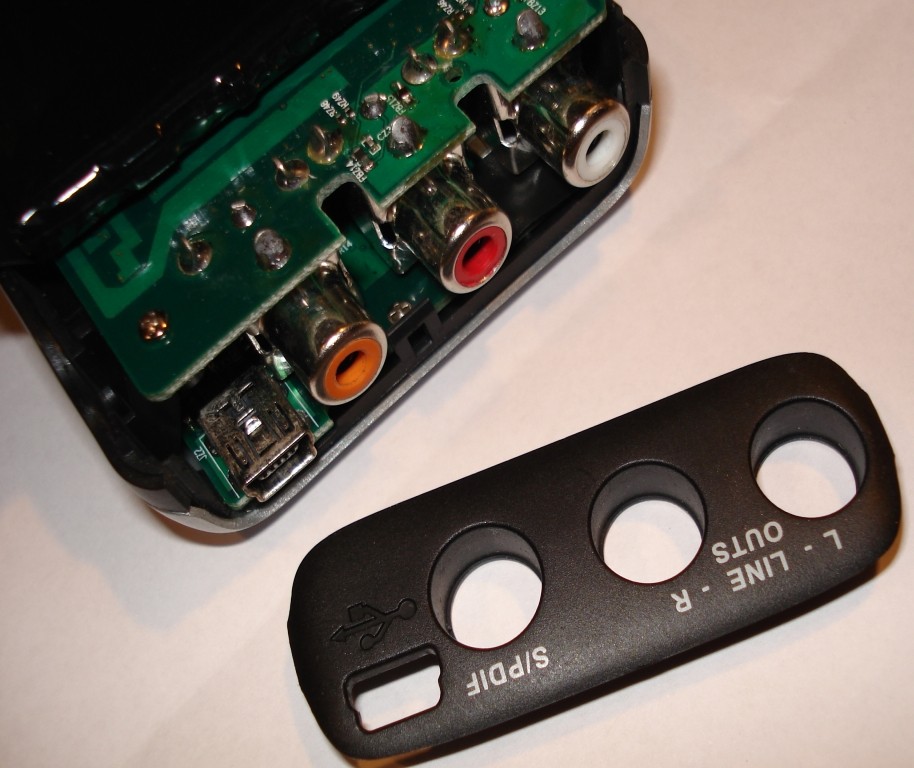
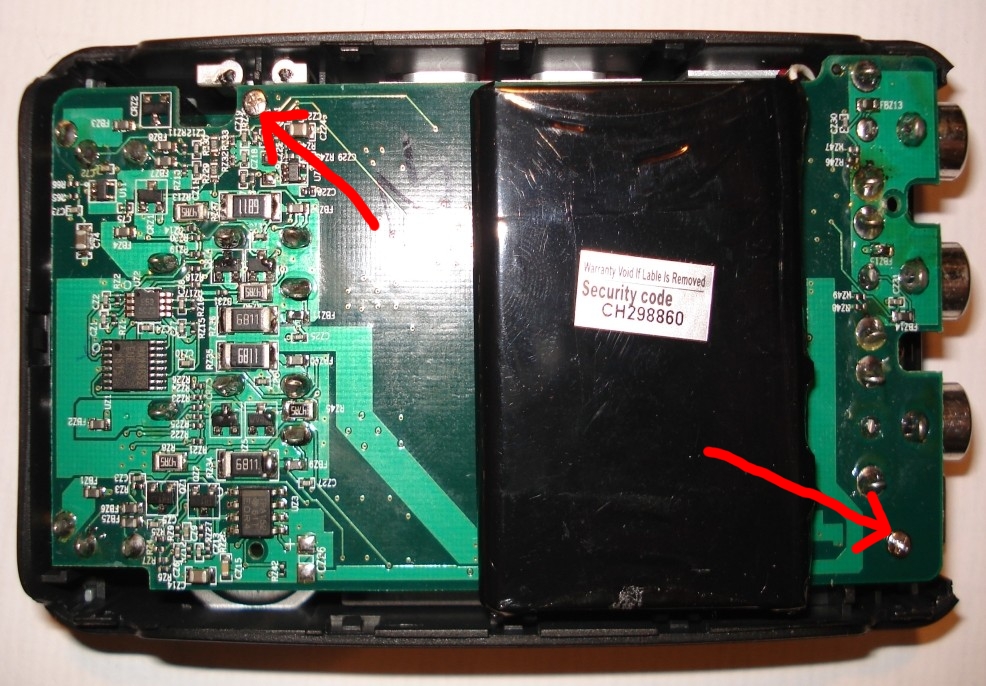
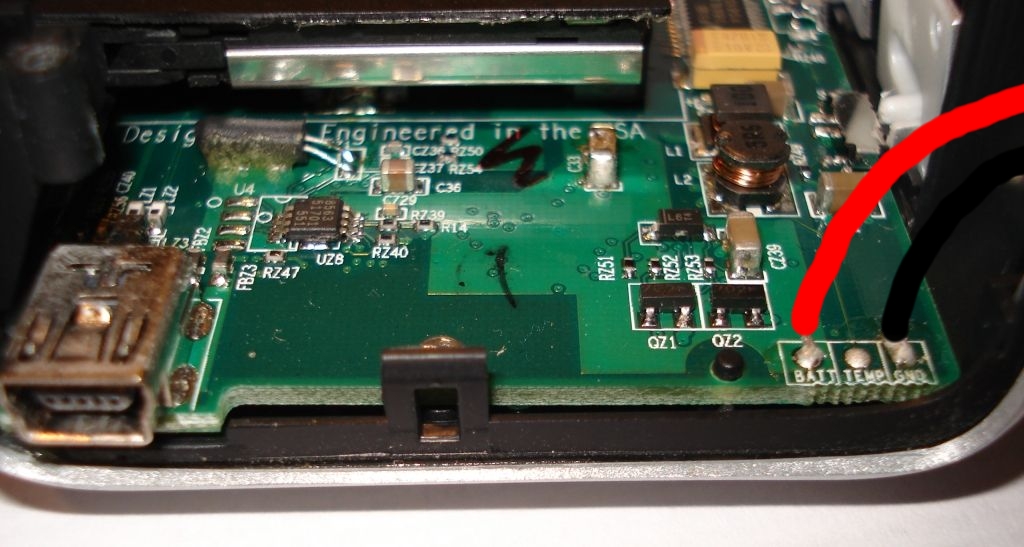
The original battery is soldered to the front circuit board. To access the front circuit board to allow disconnection of the old battery you must remove the back circuit board that will be visible once you have removed the back casing. The two screws, indicated here by the red, need to be removed. To remove the rear circuit board pull it gently away from the top side so that the input/mic/heaphone sockets are slid out of the face-plate that surronds them. Lift the circuit boad as you do this taking care not to force any thing to avoid damage. |
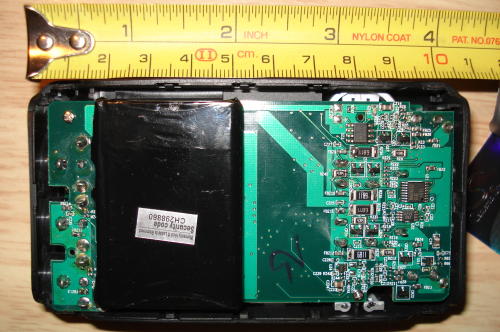
internal dimensions: |
|
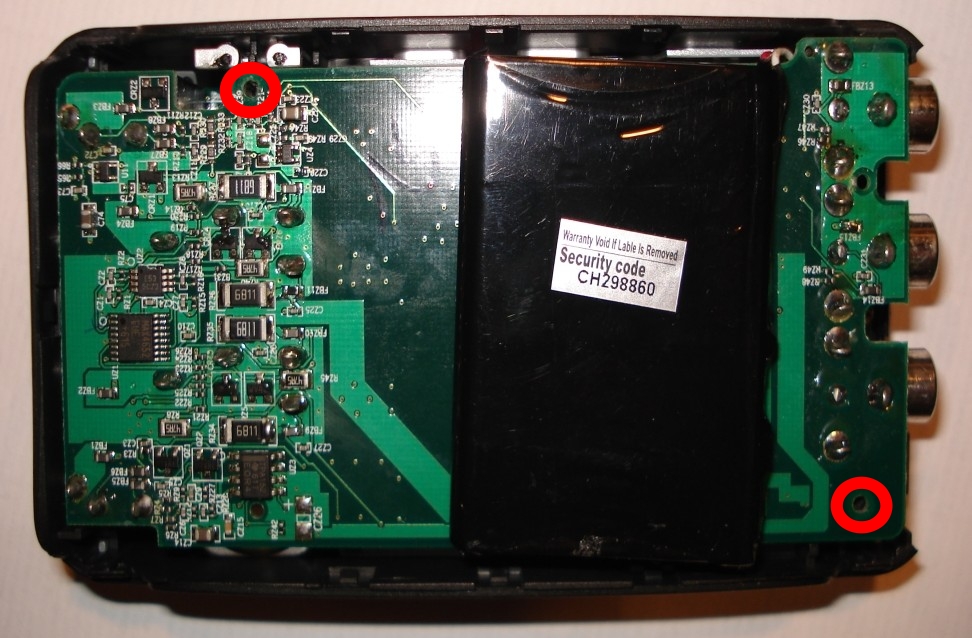
Locate these screws to remove circuit board |
|
|
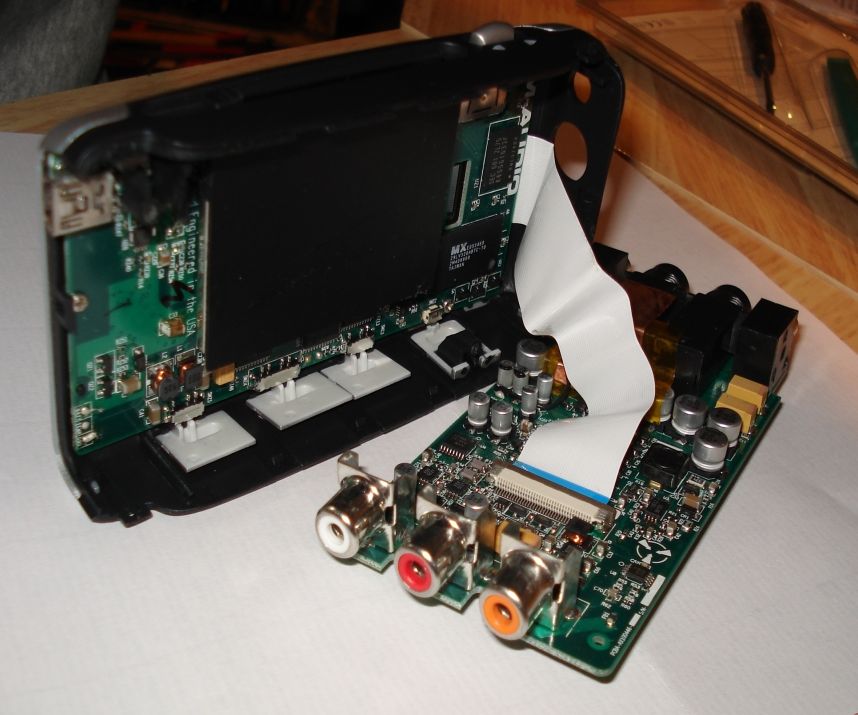
To remove the rear circuit board pull it gently away from the top side so that the input/mic/heaphone sockets are slid out of the face-plate that surronds them. Lift the circuit boad as you do this taking care not to force any thing to avoid damage.
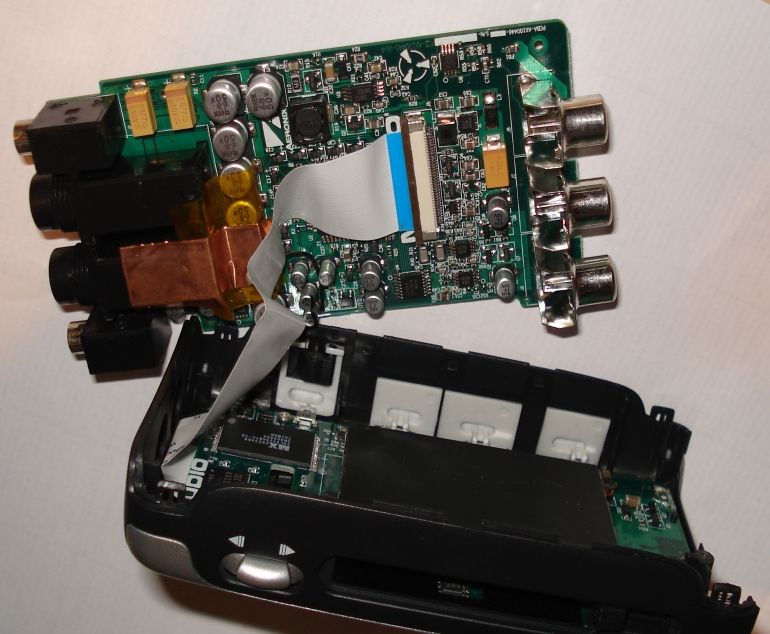
Notice that the back circuit board is connected to the front circuit board with ribbon-connector.
You should now be able to find where the original battery is soldered to the main/front circuit board.
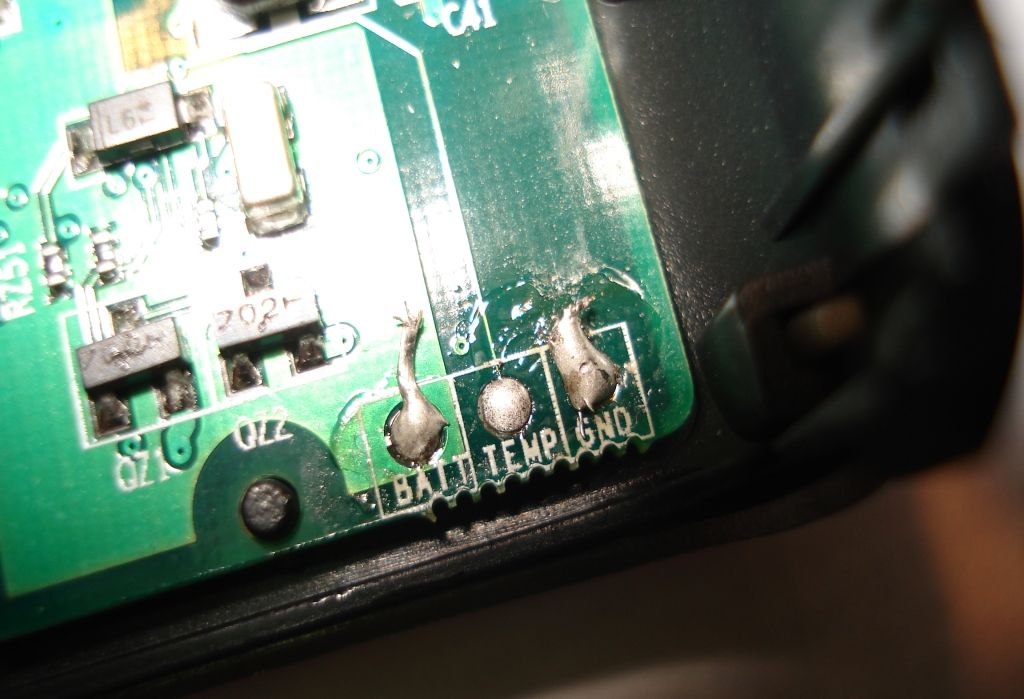
Carefully de-solder the leads (drawn in red and black here) use a low powered soldering iron to avoid removing any of the surface mounted components. Note too, the polarity/colouring of the wires: BATT: red battery wire take care too not to short any wires or terminals with your soldering iron. |
|

Attaching the new batteryChoice of batteryMy second choice for a replacement battery was an iPhone battery. NOTE: i had to extend the battery wires as the battery i received had
very short wires. make sure you insulate any join on the wires. Lithium-Polymer-ion battery, ideally of no bigger dimensions than: 60mm x 50mm x 5mm rating: 3.7v 1400mAh (or greater, 2000mAh would be great) The higher the current capacity, the more time you can use the unit between charges, though the higher capacity batteries are physically bigger. Take care not to short out any of the battery wires!! After insulating the un-wanted white-wire (use insulating tape to strap it down to the plastic outer of the new battery, carefully tin the new battery and solder the new battery to the terminals, the same way you removed the old one. i connected the iPod battery as follows: |
AGAIN- |

Re-assembling the unitOnce you have soldered the battery in place you can work backwards through the process covered so far to get your unit back together, charged-up and running again. As a wise precaution i stuck on some insulating tape over the battery solder-terminals to avoid the phono-sockets shorting out the terminals when re-assembled. There was actually a piece of insulating material here when i first opened the unit so it makes sense to put it back also!
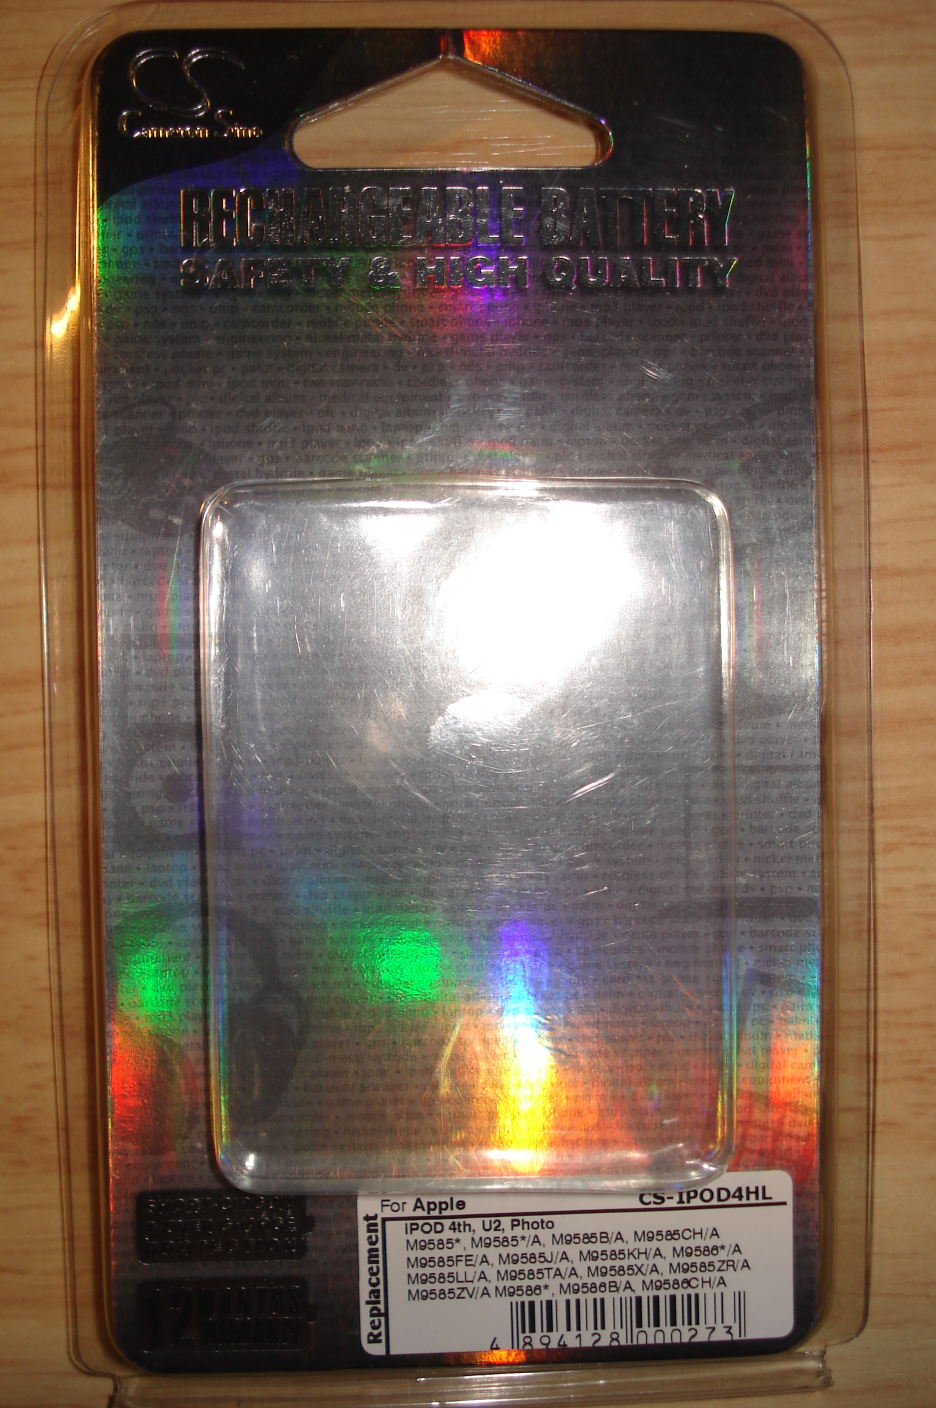
1) lower circuit boardi dangled the battery outside the unit and put the lower circuit board back in place, carefully slotting the headphone/input/mic sockets back through the faceplate holes whilst taking care not to damage the ribbon-cable. When in place screw in the two screws taken out earlier. 2) bottom face plateRe-attach the bottom face plate that surrounds the USB and SPDIF connectors. This should go in easily by opening up the sides of the main casing enough to widen the opening up without damage. 3) battery attachmentI secured the battery in place by using double-sided sticky tape, as was originally used. This should stop the battery sliding about inside the unit. As mentioned earlier my first choice of battery was an iPod 4th generation 3.7v, 1200mAh Lithium-ion battery. The leads on this (after cutting off the terminal connector block) were only just long enough to stick the batteyr to the lower end of the lower circuit board, as shown here:
4) Case re-assemblyYou can then clip the bottom casing back into place. Each of the 12 catches should will make a snap-sound as they locate back into place. My first battery attempt was with an iPod 4th generation battery (shown in these pictures) which is 6mm thick, so my bottom casing left a small gap on one side where it could not be closed up fully. This does also put some pressure on the lower circuit board, Since then i have used an iPhone battery and this fits nicely in the space provided.
see pictures of battery packets on right- 5) Charging and useAgain, as i have fitted a lower capacity battery than originally fitted (1400mAh) my usage time has been reduced from the specified times of a brand new unit. Lithium batteries do not suffer from the memory effect and should be ready to use after the first charge of an hour or two. No need to charge for several hours. After the first full charge i could record non-stop with the supplied plug-in mini stereo microphone for at least 3 hours. |
Click for close up of iPhone and iPod battery packets: |